
You’re in for a real treat if you haven’t tried Fermented Giardiniera Recipe before! This vibrant, tangy, and flavorful mixture of pickled veggies is the perfect condiment. It adds zesty goodness to sandwiches, salads, and pizza. What makes this version special? It’s fermented! It’s fermented!
This recipe was discovered when I experimented with homemade pickles. I realized that fermented Giardiniera would be a game-changer for my meals. This recipe is easy, fast, and flavorful, whether you are a novice or seasoned fermenter. It will be a hit with your family and guests.
It’s also incredibly affordable to make at home. You can make your own version in no time, instead of buying store-bought ones with questionable ingredients. It also pairs well with my homemade sauerkraut and fermented cucumbers. If you like the taste of pickled or fermented foods, then you will want to continue reading. Once you try this, you will never go back.

- What is Fermented Giardiniera?
- Why You'll Love This Fermented Giardiniera Recipe
- How to Make Fermented Giardiniera Recipe
- Quick Overview
- What to Serve Fermented Giardiniera With
- Top Tips for Perfecting Fermented Giardiniera Recipe
- Storing and Reheating Tips
- Table Health Benefits of Fermented Giardiniera Recipe
- fermented giardiniera recipe From DishBloom!
- Conclusion
- Share Your Twist!
What is Fermented Giardiniera?
What’s the meaning of a name? Why is it called Giardiniera? The word “giardiniera”, which means “garden” in Italian, comes from the giardino. Fermented Giardiniera is, in essence, a garden-in-a-jar. It’s a delicious medley that brings the flavors and aromas of a vegetable garden to your table! You may have seen Giardiniera in a Chicago-style sandwich or as a zesty topping for an Italian dish. Did you know that fermentation can enhance the flavor? This traditional method of preserving vegetables not only improves the taste but also creates a crisp and tangy texture that is hard to beat.
Why ferment vegetables? Fermentation not only adds a depth of flavor but also helps to preserve vegetables better than regular pickling. It’s also a healthy way to eat vegetables! These vegetables are rich in beneficial bacteria that can help improve digestion. When you think of Giardiniera, don’t just think of a condiment. Think of it as a nutritional powerhouse, which adds flavor to any dish.
This recipe is perfect for when you need a new topping or are craving something different. Remember: The way to a man’s heart is via his stomach – and fermented Giardiniera might be the key!

Why You’ll Love This Fermented Giardiniera Recipe
So, why should you make this fermented giardiniera recipe today? Here are three key reasons:
- Flavor-packed goodness: This recipe combines a mix of crunchy vegetables with bold spices, resulting in a taste that’s tangy, spicy, and just downright delicious. Whether you enjoy it on a sandwich, with a grilled meat dish, or even straight from the jar, this giardiniera packs a punch!
- Cost-effective: Store-bought fermented giardiniera can be pricey and often comes with unnecessary preservatives. But making it at home is not only cheaper but also allows you to control the ingredients and adjust the flavors to suit your taste. Plus, it makes a big batch, so you’ll have plenty of leftovers to enjoy!
- Versatile and health-conscious: Fermented foods are packed with probiotics, which are great for gut health and digestion. By making your own giardiniera, you’re ensuring that it’s not only flavorful but also good for you. It’s the perfect addition to sandwiches, salads, and even pasta dishes. It’s like a garden-fresh, tangy, probiotic booster that enhances any meal.
If you’ve ever tried a store-bought version of giardiniera, it can lack the depth of flavor that comes from a natural fermentation process. Making it at home lets you experience the difference! If you’re a fan of fermented sauerkraut, then this recipe is another excellent way to explore the magic of fermentation in your kitchen.
How to Make Fermented Giardiniera Recipe
Quick Overview
It’s easier than you think to make fermented Giardiniera Recipe! This recipe is easy to follow: you need to chop the vegetables, prepare a brine, and let fermentation work its magic. This is a great way to preserve vegetables, enhance the flavor of your food, and improve gut health all at once. The process is relatively hands-off and only requires a small amount of attention during the fermentation phase.
Key Ingredients for Fermented Giardiniera Recipe
Before you start, gather these ingredients:
- 1 cup carrots, sliced into thin rounds
- 1 cup celery, chopped
- 2 cups cauliflower florets
- 1 cup green olives, pitted and sliced
- 1/2 cup red bell pepper, diced
- 1 teaspoon mustard seeds
- 1 teaspoon coriander seeds
- 4 cloves garlic, minced
- 1 teaspoon red pepper flakes (adjust to taste)
- 1 tablespoon salt (non-iodized)
- 2 cups filtered water
- 1 tablespoon apple cider vinegar (optional, for extra tang)
It’s worth noting that you can customize the vegetables in your giardiniera. Want to add some hot peppers for heat? Go for it! The beauty of this recipe is in its flexibility; you can tailor the ingredients to your taste.
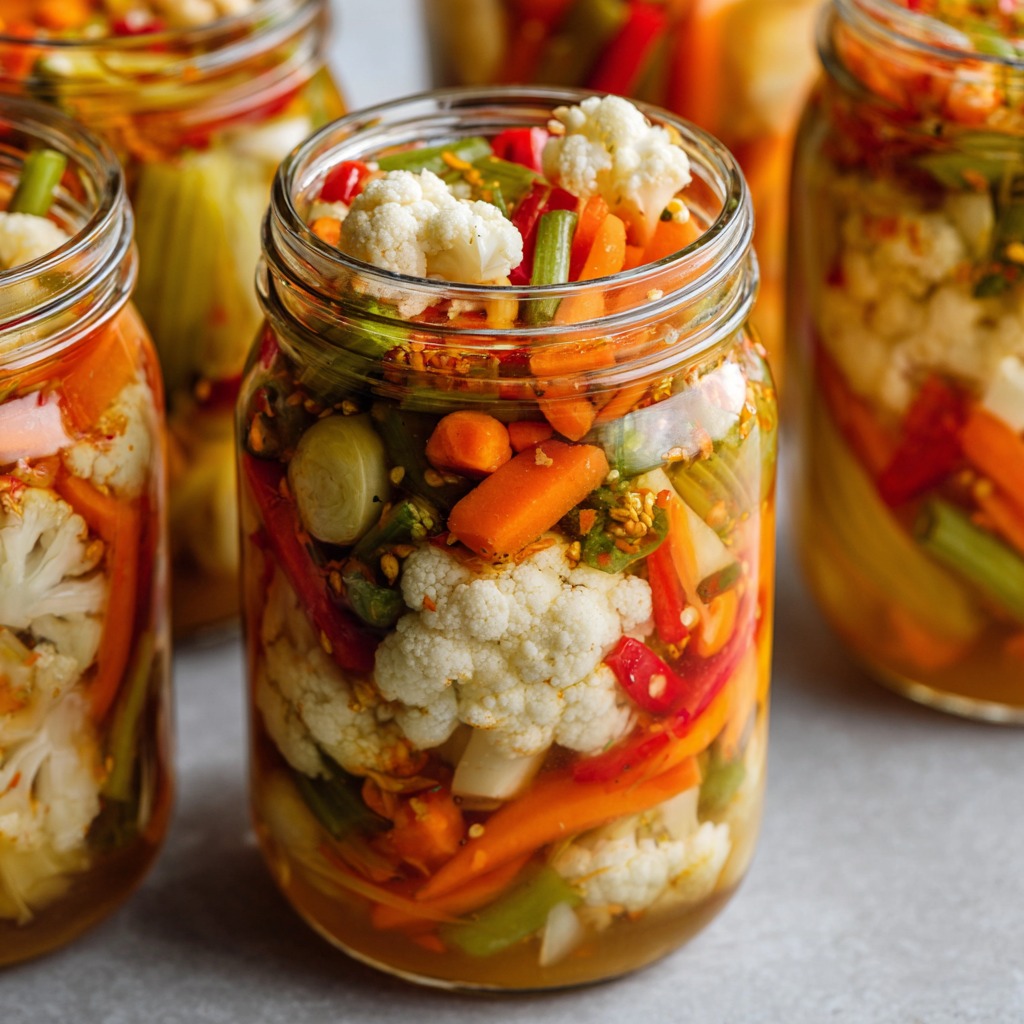
Step-by-Step Instructions
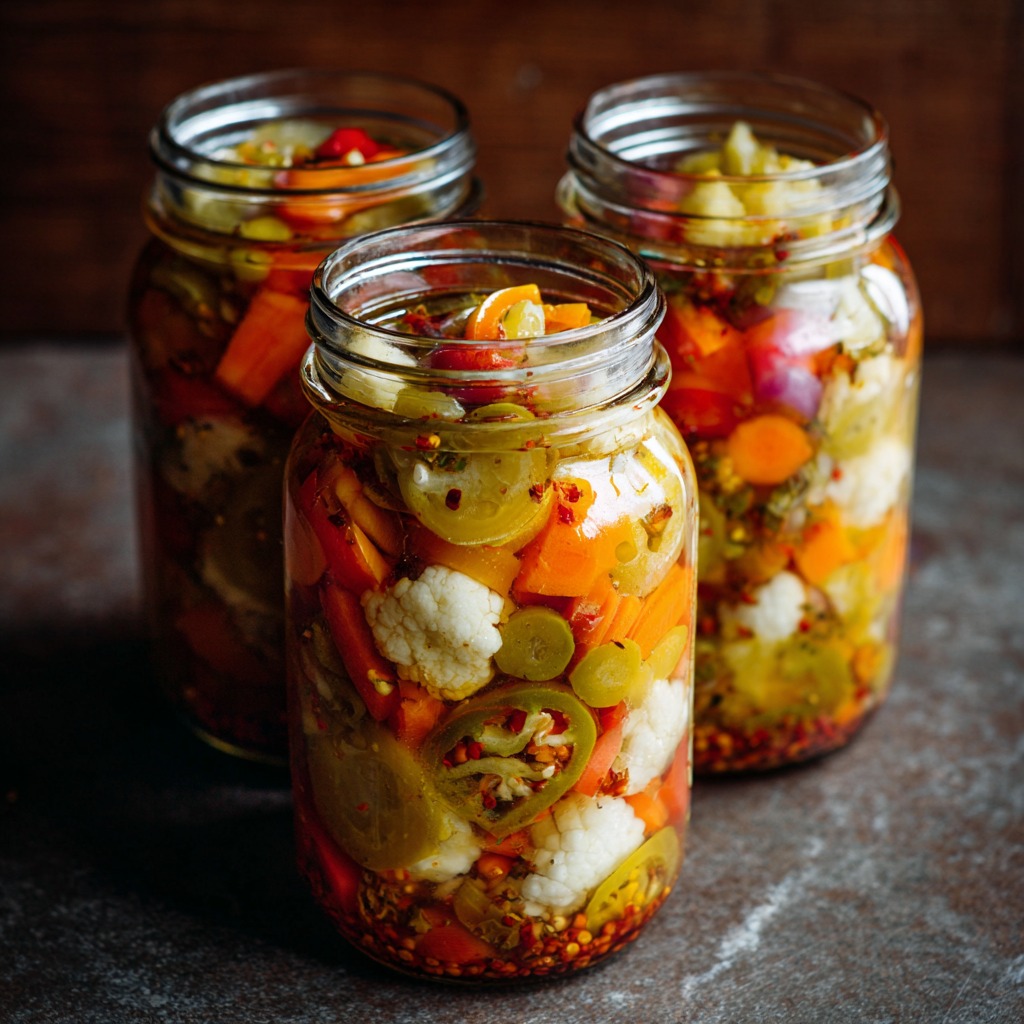
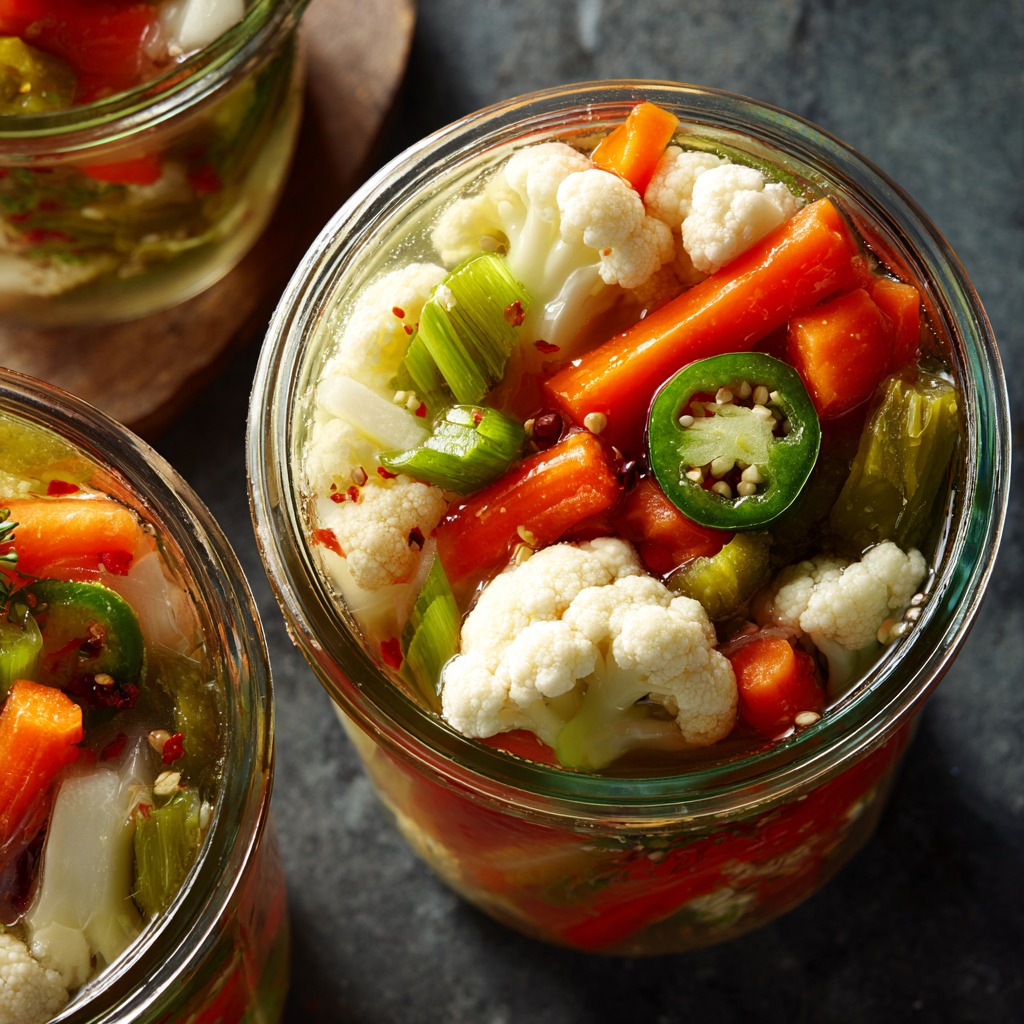
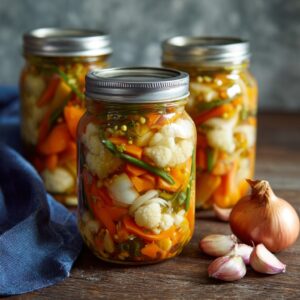
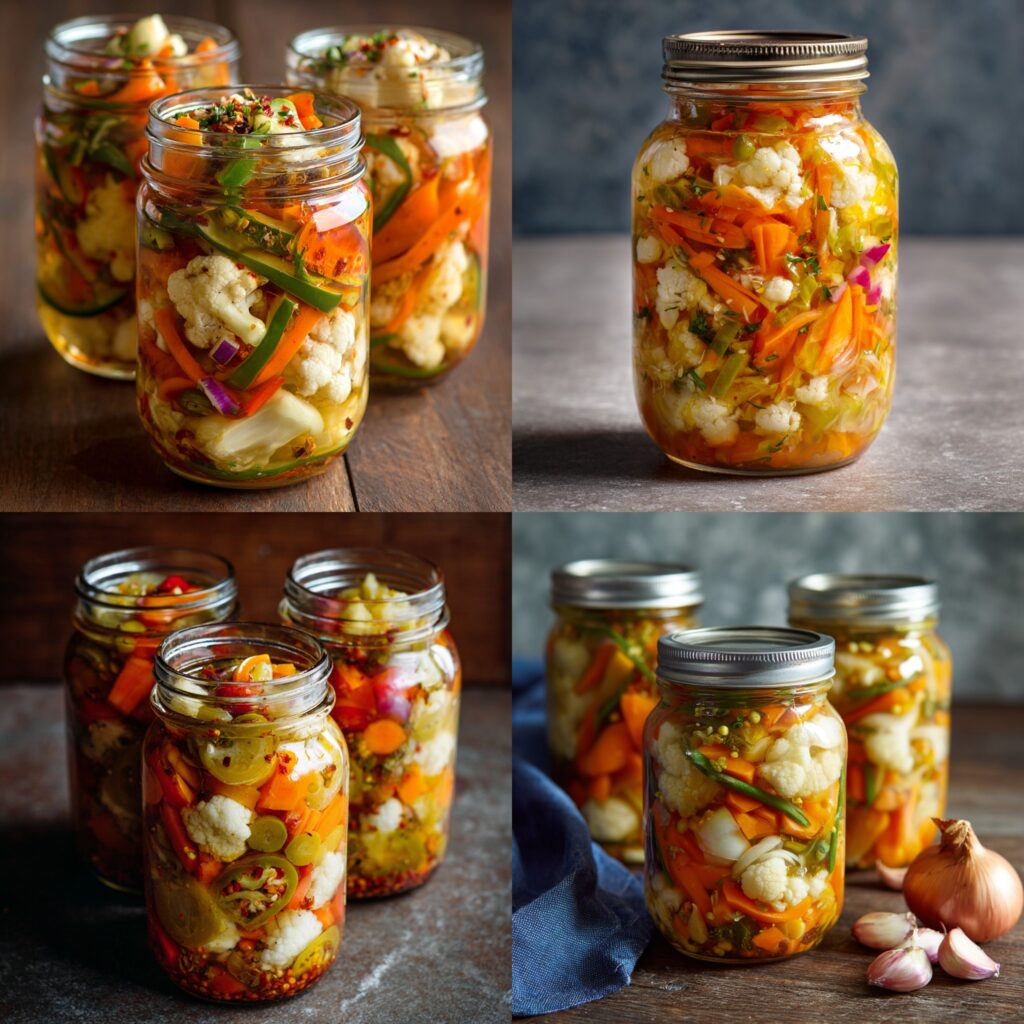
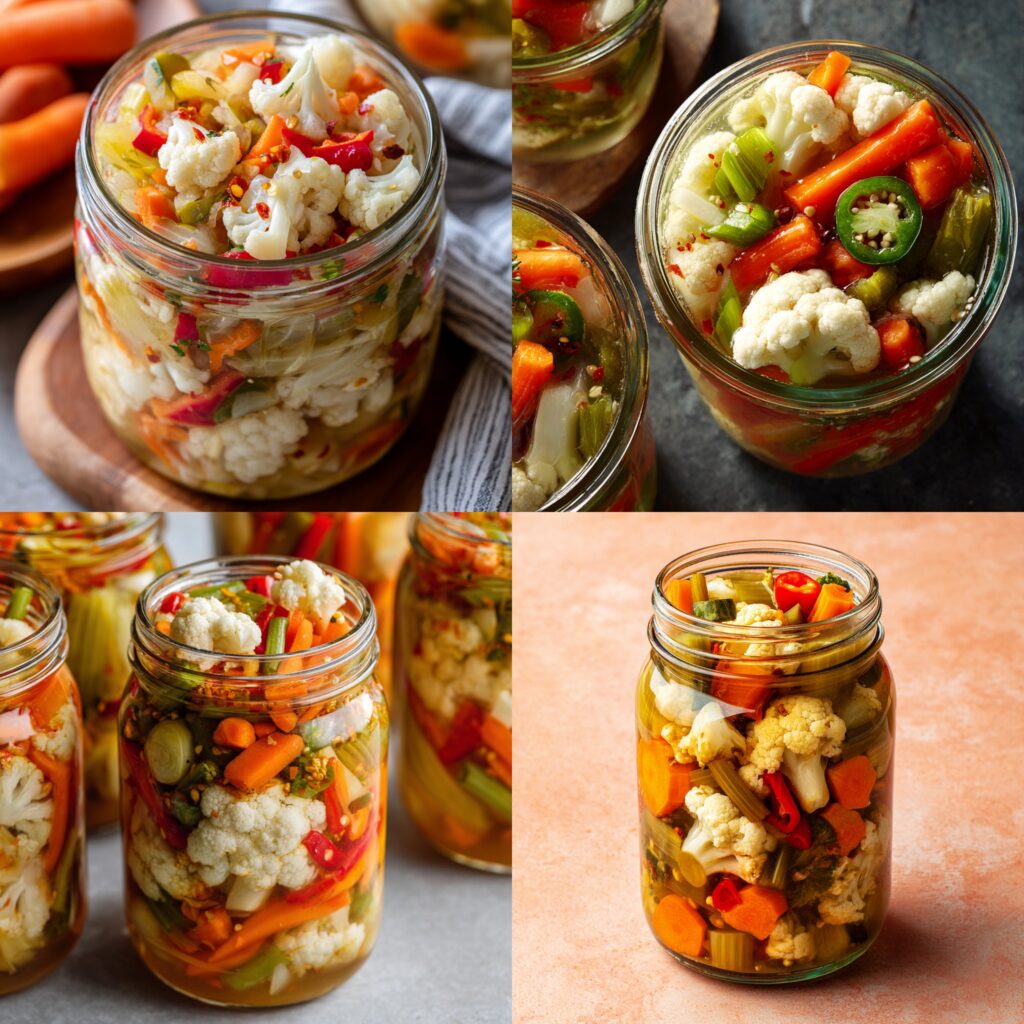
- Prepare the vegetables: Wash and chop the cauliflower, carrots, celery, red bell pepper, and garlic. Slice the green olives and set them aside.
- Make the brine: In a saucepan, bring the water to a boil. Add the salt and stir until dissolved. Remove from heat and let it cool to room temperature.
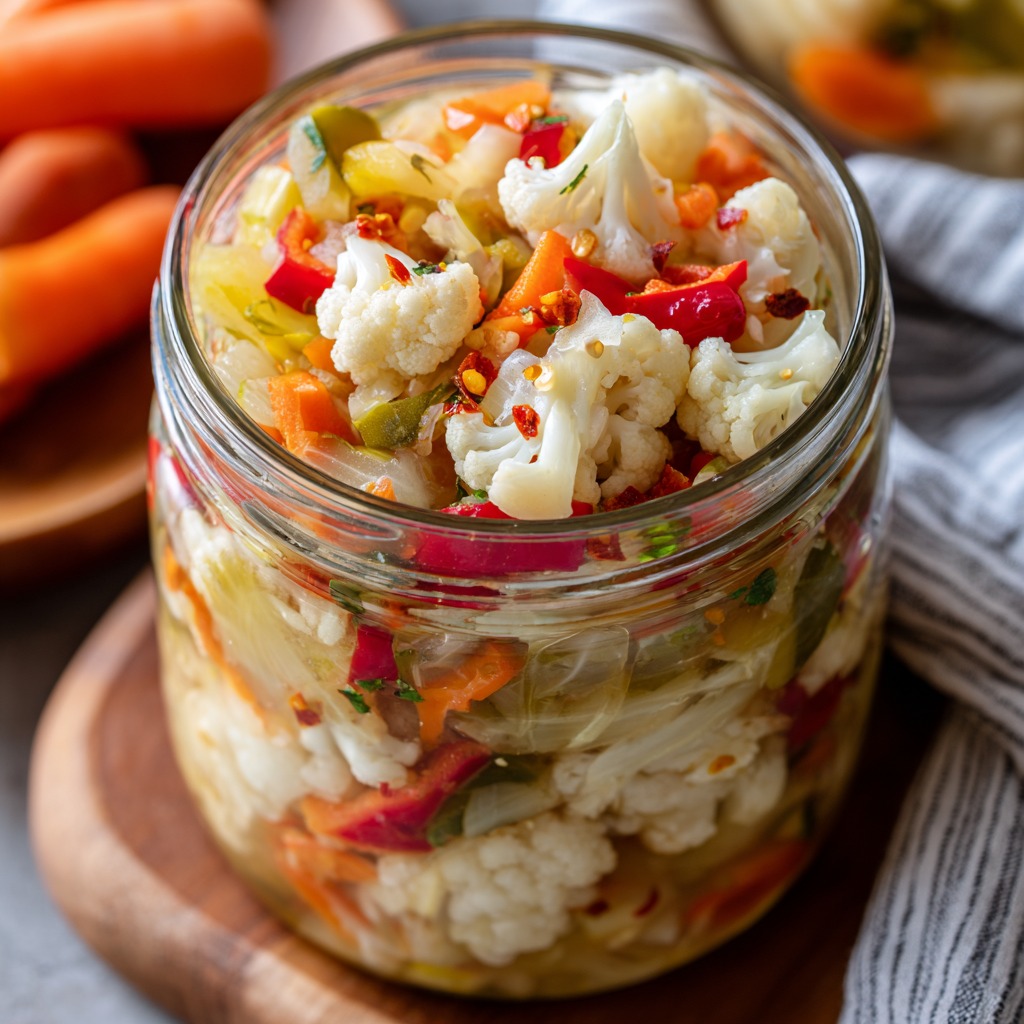
- Pack the jar: In a large, clean glass jar, layer the prepared vegetables, making sure they are packed tightly. Add in the mustard seeds, coriander seeds, and red pepper flakes. If you’re using apple cider vinegar, pour it in at this stage.
- Pour the brine: Once the brine has cooled, pour it over the vegetables in the jar, ensuring everything is fully submerged. You can place a small weight (like a clean rock or a jar) on top to keep the veggies submerged.
- Ferment: Cover the jar loosely with a lid or cloth, allowing air to circulate while preventing debris from getting in. Let the jar sit at room temperature for 3-5 days, tasting it daily until it reaches your desired level of tanginess. If you prefer a more vigorous fermentation, you can leave it for longer.
- Store: Once fermented to your liking, transfer the jar to the refrigerator to slow down the fermentation process. It will last for several weeks in the fridge.
What to Serve Fermented Giardiniera With
Fermented giardiniera Recipe is a versatile side dish that pairs perfectly with many different meals. Try serving it with:
Tacos: The spiciness and tanginess make it an excellent topping for tacos or burritos.
Italian subs or sandwiches: The crunchy, tangy giardiniera adds a burst of flavor to any sandwich.
Grilled meats: Serve it alongside grilled chicken, pork, or steak for a refreshing, flavorful side.
Salads: It makes a fantastic topping for a green salad, offering a savory contrast to the freshness of the greens.
Pizza: Add a little giardiniera on top of your pizza for an extra kick.
Top Tips for Perfecting Fermented Giardiniera Recipe
- Use filtered water: Tap water can contain chlorine, which can interfere with the fermentation process. Use filtered water for the best results.
- Adjust the spice level: If you like things spicy, add more red pepper flakes or toss in a few hot peppers!
- Experiment with veggies: While cauliflower, carrots, and celery are traditional, you can experiment with other vegetables like onions, fennel, or even green beans.
- Ferment longer for a stronger flavor: If you enjoy a tangier flavor, let the giardiniera ferment for a few extra days.
Storing and Reheating Tips
Reheating: If you want to reheat it, do so gently by warming it on the stove, but it’s best enjoyed chilled or at room temperature for the full flavor.
Storage: Keep your fermented giardiniera Recipe in a sealed glass jar in the fridge. It will stay fresh for up to a month.
Freezing: While freezing is not ideal for maintaining the crunchiness, you can freeze the giardiniera in an airtight container for up to 3 months.
Table Health Benefits of Fermented Giardiniera Recipe
| Health Benefit | Description |
|---|---|
| Probiotics | Fermentation produces beneficial bacteria (lactic acid bacteria) that aid in digestion and support gut health. Probiotics are known to balance the gut microbiome and improve overall digestion. |
| Rich in Vitamins | Vegetables like cauliflower, carrots, and peppers are packed with essential vitamins (A, C, and K) that support immune function, skin health, and eye health. |
| Supports Immune Health | The fermentation process not only creates probiotics but also boosts the levels of immune-supporting nutrients in the vegetables, like Vitamin C and antioxidants. |
| Improved Digestion | The probiotics in fermented foods like giardiniera help break down food more efficiently, improving digestion and nutrient absorption. |
| Low in Calories | Fermented giardiniera is a low-calorie condiment, making it an ideal option for anyone looking to add flavor without extra calories. It’s a great way to enhance dishes without overeating. |
| High in Fiber | The vegetables used in giardiniera are high in dietary fiber, which promotes a healthy digestive system, helps regulate blood sugar levels, and supports weight management. |
| Anti-inflammatory | Vegetables like cauliflower and carrots contain compounds with anti-inflammatory properties, which may help reduce inflammation in the body. |
| Rich in Antioxidants | Ingredients like bell peppers and garlic are rich in antioxidants, which fight free radicals in the body, helping to protect cells from damage and supporting overall health. |
| Supports Weight Loss | Fermented giardiniera can be a satisfying, low-calorie topping for dishes, providing fullness without adding excessive calories. The fiber and probiotics help control appetite and promote healthy metabolism. |
fermented giardiniera recipe From DishBloom!

Fermented Giardiniera
Equipment
- 1 large glass jar (quart-sized or larger)
- Small plate or jar weight (to keep the vegetables submerged)
- Medium saucepan (for making the brine)
- Knife and cutting board
- Measuring spoons
- Spoon or spatula for packing the jar
Ingredients
- 2 cups cauliflower florets
- 1 cup carrots sliced into thin rounds
- 1 cup celery chopped
- 1 cup green olives pitted and sliced
- 1/2 cup red bell pepper diced
- 4 cloves garlic minced
- 1 teaspoon mustard seeds
- 1 teaspoon coriander seeds
- 1 teaspoon red pepper flakes adjust to taste
- 1 tablespoon salt non-iodized, such as sea salt
- 2 cups filtered water
- 1 tablespoon apple cider vinegar optional, for extra tang
Instructions
- Prepare the vegetables: Wash and chop the cauliflower, carrots, celery, red bell pepper, and garlic. Slice the green olives and set them aside.
- Make the brine: In a medium saucepan, bring the water to a boil. Add the salt and stir until fully dissolved. Remove from heat and let it cool to room temperature.
- Pack the jar: In a large, clean glass jar, layer the prepared vegetables, packing them tightly to prevent air pockets. Add in the mustard seeds, coriander seeds, and red pepper flakes. Pour in the optional apple cider vinegar if using.
- Pour the brine: Once the brine has cooled, pour it over the vegetables in the jar, ensuring everything is fully submerged. You can place a small weight (such as a clean rock or another jar) on top to keep the vegetables submerged under the brine.
- Ferment: Cover the jar loosely with a lid or cloth, allowing air to circulate while preventing debris from getting in. Leave the jar at room temperature for 3-5 days, tasting daily to check the flavor and fermentation. The giardiniera will get more tangy as it ferments.
- Store: Once it reaches your desired tanginess, transfer the jar to the refrigerator to slow the fermentation process. It will keep for several weeks in the fridge.
Notes
- Customization: Feel free to adjust the vegetables based on what you have on hand. You can add ingredients like green beans, fennel, or onions.
- Spice level: If you prefer more heat, add additional red pepper flakes or fresh chili peppers to the jar.
- Fermentation time: The longer the giardiniera ferments, the tangier it will become. Taste daily and remove it from the counter once it reaches your desired flavor.
- Storage: Keep in the refrigerator for up to 4 weeks. Avoid leaving it out at room temperature for more than a few days after fermentation, as the probiotics may degrade.
Conclusion
Fermented vegetables are a delicious and easy way to add tangy vegetables rich in probiotics to your diet. Enjoy a healthy and fresh condiment with this simple recipe. It’s also cost-effective. The crunchy texture and zesty taste will enhance any dish, whether you use it as a condiment, on sandwiches, grilled meats, or as a tasty snack. The fermentation process is not only delicious, but it also has many health benefits. It can help with digestion and boost gut health.
Why not try this fermented Giardiniera? This is a fun and rewarding process, which results in a vibrant and tangy topping that your family and guests will love. You can create a delicious jar of goodness with just a few simple ingredients. This recipe is sure to become a favorite in your kitchen once you taste the flavor and discover its health benefits.
Share Your Twist!
Please tell us how you made this fermented Giardiniera unique! You can add extra spice by adding a few hot chili peppers or changing the vegetables. Or, you can experiment with different spices and personalize the brine. Your twist may inspire others to be creative in the kitchen. Let us know what you think of your version! Please tag us in your social media posts or comment below. We can’t wait for you to share your unique version of this probiotic-packed, tangy condiment. Happy fermenting!
FAQs: Fermented Giardiniera Recipe
1. What is fermented giardiniera?
Fermented giardiniera is a tangy, crunchy mix of pickled vegetables (like cauliflower, carrots, and peppers) that undergoes a natural fermentation process. The fermentation introduces beneficial probiotics, which can aid in digestion and improve gut health. It’s a healthy, flavorful condiment that’s perfect for sandwiches, salads, and more!
2. How long does it take to ferment giardiniera?
The fermentation time for giardiniera typically ranges from 3 to 5 days at room temperature. The longer it ferments, the tangier it becomes. It’s important to taste it daily to ensure it reaches your desired level of sourness.
3. Can I use any vegetables for giardiniera?
Absolutely! While the traditional vegetables in giardiniera are cauliflower, carrots, and celery, you can customize the mix with any veggies you prefer. Try adding green beans, zucchini, fennel, or even onions. Just be sure to keep the vegetables firm to maintain a good crunch after fermentation.